Show and Tell — A Master Primer
Most Recent Update: October 18, 2026
This guide is the free edition of a comprehensive project I started earlier in 2026 after building the {Show and Tell} in paper. After extensive testing and reviewing a wide range of community resources, I realized no single resource consolidated all the necessary information into one cohesive guide.
This free edition provides a solid foundation for anyone looking to learn and pilot the deck. For players seeking deeper mastery, I offer a Premium Edition that receives ongoing updates and includes comprehensive matchup breakdowns, detailed sideboarding plans, and analysis of complex interactions and lines.
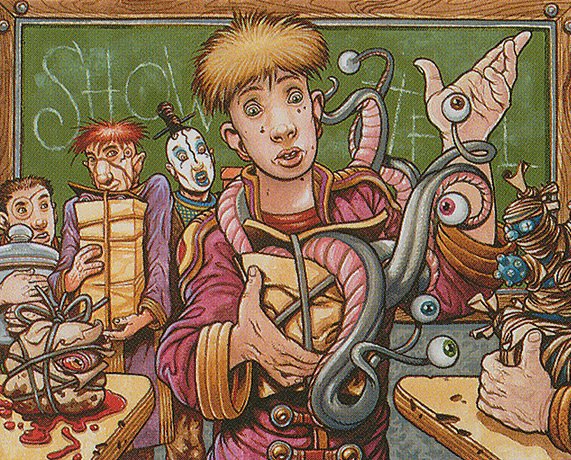
{Show and Tell} by Jeff Laubenstein
About Me
Before we dive in, you might be asking: Why should you take deck advice or purchase a guide from me? Allow me to introduce myself and share my experience with the deck.
My name is Silas Pereira, also known as TheGrimLavamancer on Magic Online (MTGO). I started playing Magic around 2014–15, and I learned the game through Legacy, the format which I have dedicated myself to ever since. Over the past decade, I've learned nearly everything I know about competitive Magic from Legacy, with a deep passion for Tempo and Combo strategies.
In the paper world, I’ve made multiple Top 8s and finals. Beyond playing, I am deeply committed to the community: I organize local tournaments to keep Legacy alive and thriving in my country, and I previously wrote Legacy strategy articles for Cards Realm.
I used to be a dedicated Reanimator player, but the {Entomb} forced me to find a new combo deck to master. That search led me straight to Sneak and Show. My results with the archetype so far:
Legacy Challenge: 13x Top 8 Finishes
Legacy Challenge: 3x Tournament Wins (Finalist)
Legacy Showcase Challenge: 1x Top 4 Finish
Legacy Leagues: Multiple 5-0 Trophies
Local Monthly Legacy League: 2x Season Champion (Qualified for the Year-End Championship)
Ecobaronen Championship: Top 8 (Qualified for the Year-End Championship)
Alpha Legacy 50K (IRL): Top 16 out of 140 players
I have logged over 500 matches on MTGO. Between unrecorded paper tournaments and casual league runs, I've played comfortably more than that.
TheGrimLavamancer | MTGGoldfish
You can also reach me on Discord using the nickname TheGrimLavamancer or on Twitter, where I post about Magic. I also have a YouTube channel.
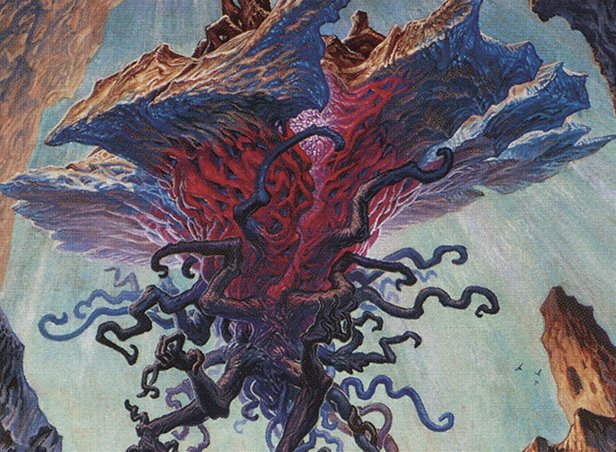
{Emrakul, the Aeons Torn} by Mark Tedin
1. Deck Introduction
Show and Tell's core mechanics have always been the same: the deck tries to bring some of the most powerful cards in Magic into play for very little mana, like {Emrakul, the Aeons Torn}, {Atraxa, Grand Unifier}, {Griselbrand} (like in the old days), or {Omniscience}. It achieves this using {Show and Tell}, a "symmetrical" effect that isn't actually symmetrical, and {Sneak Attack}, which can "cheat" creatures onto the battlefield. Mana acceleration like {Lotus Petal} provides speed, cantrips like {Brainstorm} and {Ponder} offer consistency, and counterspells like {Force of Will} add toughness.
{Sneak and Show}, {Omnisneak}, {Omnitell}, {EurekaTell}, or {AlurenTell}?
We generally distinguish five types of decks that play {Show and Tell} (leaving aside decks like 12-Post and Reanimator, which often run {Show and Tell} in the sideboard): {Sneak and Show}, {Omnisneak}, {OmniTell}, {EurekaTell} and {AlurenTell}.
{Sneak and Show} is the deck's simplest variant. It relies entirely on creatures to win. Players often run as many playsets as possible, primarily four each of {Show and Tell}, {Sneak Attack}, {Griselbrand}, {Atraxa, Grand Unifier}, and {Emrakul, the Aeons Torn}. {Sneak and Show} is very fast and consistent, but far less flexible than OmniSneak. The deck has fewer options for dealing with hate cards like {Karakas}, {Containment Priest}, or {Ashen Rider}. However, it doesn't require any detours to win.

{Karakas} by Nicola Leonard
OmniSneak is the "playful" variant of Sneak and Show. The deck gets its name from {Omniscience}, which it uses as an additional combo piece. This makes it a hybrid between Sneak and Show, and OmniTell. {Omniscience} allows the deck to frequently kill on the spot, and with {Release the Ants}, it also has a true combo kill option. Since OmniSneak doesn't need to attack and can only win via instants in response to opponent effects, it's less vulnerable to hate cards.
OmniSneak also frequently plays {Cunning Wish}. This reduces sideboard size, but the deck finds the answer it needs faster. It's hard to say which variant is stronger: both OmniSneak and Sneak and Show regularly place highly in major tournaments.
OmniTell is either mono-[u], [u][r], [u][g], or [u][b]. It relies solely on {Show and Tell} to put {Omniscience} into play. It usually runs significantly more cantrips than OmniSneak, and {Cunning Wish} is more important. The key difference is that it lacks {Sneak Attack}.
EurekaTell, the rarest variant of {Show and Tell}, is Simic ([u][g]). Its scarcity comes mainly from {Eureka}'s rarity and high financial cost. Because {Eureka} and {Show and Tell} function so similarly, the deck benefits from incredible redundancy. However, its main drawback—aside from the price tag—is that despite having access to {Veil of Summer} and {Carpet of Flowers}, the [r] splash offers superior sideboard cards like {Hexing Squelcher}, {Pyroblast}, and {Red Elemental Blast}.

{Carpet of Flowers} by Rebecca Guay
AlurenTell incorporates a green splash for {Aluren} alongside classic {Show and Tell} payoffs. It can win instantly via the {Aluren} + {Acererak the Archlich} combo, or value-engine through Atraxa into an {Omniscience} or {Aluren} finish. Multiple overlapping lines make this build versatile, but choosing the optimal path requires deep matchup knowledge and precise execution.
Moving forward, this guide will focus exclusively on the Sneak and Show variant. In my personal opinion, this remains the definitive version of the archetype. It offers incredible redundancy, explosive speed, and a straightforward game plan, while granting access to the format's best splash color.
Furthermore, it performs exceptionally well across various metagames, proving highly resilient against diverse hate packages—including countermagic, discard, and permanent-based disruption.
2 – Card Choices
2.1 - Main Deck
In this section, we'll deep-dive into the deck's core card choices, explain optimal card counts, and evaluate their current positioning.
The goal isn't to lock these slots down as definitive, but to give you a structural blueprint you can adapt to your local metagame and personal playstyle.
To keep things organized, we’ve broken the breakdown into five categories:
Combo Pieces
Cantrips
Counterspell
Manabase
Sideboard
2.1.1 - Combo Pieces
This is the core of the deck. It's not set in stone—but don't mess with it without experience and a good reason. [x]/[y] describes how often Sneak and Show play the card, respectively.
4/4 {Show and Tell} — Our namesake. An absolutely absurd card, the kind you have to love: symmetrical in theory, but not at all in practice.
Of course, the opponent can put a whole bunch of cards inside the {Show and Tell} that hinder us, like {Karakas}, {The One Ring}, or a sideboard card!
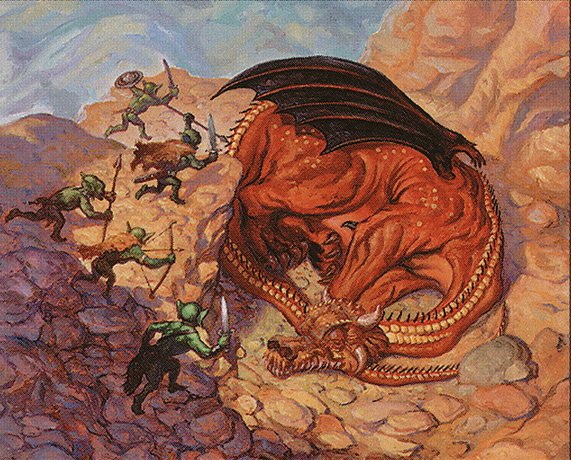
{Sneak Attack} by Jerry Tiritilli
If the opponent puts a Planeswalker inside,
please politely point out that it's not allowed… The only reason to play just 3 {Show and Tell} is {Burning Wish}. Otherwise: Always 4.
4/4 {Sneak Attack} — The old artwork for {Sneak Attack} shows many small goblins sneaking up on a dragon. A more accurate description would be if the dragon were thrown like a giant bowling ball onto a pile of goblins... {Sneak Attack} is there to sneak our big creatures into the game.
0/1 {Through the Breach} — Used to see more play from Mono-Red Sneak Attack variants utilizing heavy fast-mana acceleration. While a [1]-mana cost can sometimes make a spell difficult to resolve, some lists still run a 1-1 split alongside {Sneak Attack} to exploit its unique benefits. Its major upside is its instant-speed ability, letting it play around cards like {Force of Negation}. It also shines in mirror matches or as a replacement for {Sneak Attack} when the meta is heavily relying on {Disruptor Flute} or {Pithing Needle}.

{Through the Breach} by Hugh Jamieson
0/1 {Yggdrasil, Rebirth Engine} — Much like {Through the Breach}, {Yggdrasil, Rebirth Engine} is sometimes run as a 1-of in the main deck to attack the opponent or threaten a combo from an alternative angle. However, like {Sneak Attack}, it struggles heavily against {Pithing Needle} and {Disruptor Flute}. It is also susceptible to being countered by {Consign to Memory}. Despite these vulnerabilities, it remains a strong choice in a meta heavy on discard spells. It also works well as a sideboard tool and an excellent mirror-match option to replace {Show and Tell}.
3/4 {Emrakul, the Aeons Torn} – Cthulhu. The Flying Spaghetti Monster. Aunt Emma. The largest regular-printed creature in Magic throws superlatives around like a carnival dancer with candy. It's not quite invulnerable, though.
When you attack, announce the Annihilator trigger so your opponent dutifully sacrifices six permanents. Also, remember the extra turn from its cast trigger if you play it through {Omniscience}.
3/4 {Atraxa, Grand Unifier} – Flying, Lifelink, Deathtouch with "draw 7 upon entering the battlefield and can be pitched for {Force of Will}. Super powerful if the meta is full of {Orcish Bowmasters}; vulnerable only to {Karakas}, {Stifle}, and Red Blast effects, or effects like {Dress Drown}, {Torpor Orb}, and similar effects.

{Griselbrand} by Igor Kieryluk
0/1 {Griselbrand} – “Hey, remember that totally unfair and rightfully banned card? Let’s print it as a creature, with lifelink and flying!” “Absolutely! Pass me that coke again!” The meeting that gave rise to {Griselbrand} must have gone something like that. The card is simply awesome.
Once the big demon is on the field, usually only {Stifle}, {Orcish Bowmasters}, {Leovold, Emissary of Trest}, and {Disruptor Flute} can stop us from drawing cards.
Note: At the time of writing, {Orcish Bowmasters} dominates the metagame, leading many pilots to cut {Griselbrand} entirely from their main decks. However, if {Orcish Bowmasters} eventually gets banned, {Griselbrand} could easily make a comeback—though {Atraxa, Grand Unifier} still has her own pros and cons.

{Orchish Bowmasters} by Ron Spencer
Ultimately, we will likely see a split between both creatures. For now, run {Griselbrand} only if you expect a field heavy on white decks or in the mirror match.
0/1 {Archon of Cruelty} – As a non-legendary threat, this creature can close out the game in just one or two attacks. It provides immediate removal for a creature or planeswalker when it enters the battlefield and whenever it attacks, while also stabilizing your life total and drawing cards.
It shines against strategies like Lands—bypassing both {Karakas} and {Maze of Ith}—and Death and Taxes (as long as you have counterplay ready for Swords to Plowshares). It is also excellent in the mirror match as a punishing response to an opponent’s {Show and Tell}. Overall, it's an incredible payoff against any deck that doesn't run {Swords to Plowshares}.
0/2 {Omniscience} – “Hey, remember that other totally unfair card that was banned for ages? Let’s reprint it one-sided with upside!” “Brilliant idea! Pass me the crack pipe too!”
Okay, {Omniscience} does cost [7][u][u][u], but we couldn’t care less. Once it’s on the table, we can empty our entire hand. Most of the time, having {Omniscience} on the table means instant game over if you have Emrakul.

{Omniscience} by Jason Chan
Most lists now run one or two copies, as you will see ahead. One of our new cantrips allows us to sculpt our hand perfectly once {Omniscience} is in play (looking at you, Stock Up). Furthermore, {Omniscience} allows you to play right through a {Containment Priest}.
2.1.2 - Cantrips
4 {Brainstorm} — It's {Brainstorm}! Perhaps the best, but certainly the most useful spell in Legacy, simply can't be missing from this deck. It searches for combo pieces and answers, hides important cards from discard, and much more.
"Brainstorming properly" is an art in itself, and smarter people than me have already written a lot of correct, important things about it. We're playing four copies.
4 {Ponder} — Depending on the situation, {Ponder} is even better than {Brainstorm}. Shuffling the library often prevents us from bricking or screwing. {Ponder} turn one is a classic opening for this deck.
Playing {Ponder} correctly also requires some finesse. More on that later. We're playing four copies.

{Preordain} by Scott Chou
0/4 {Preordain} — {Preordain} only lets us see two cards, making it undeniably weaker than {Ponder}. Nevertheless, {Preordain} is the third-best cantrip in Legacy.
Keeping one card and discarding one makes {Preordain} very versatile. However, playing {Preordain} on turn one always signals to the opponent that you're playing a combo deck. Most decks play 2-4 unless they play {Stock Up}.
3/4 {Stock Up} — It seems that after {Dig Thought Time} and {Treasure Cruise} being banned, the deck found the "cantrip" of "high cost". {Stock Up} is really good because you can easily cast it on turn two, and it often leaves your opponents unsure whether they must counter.
It's also good because {Stock Up} didn't draw, but it put a card in our hand, which plays around {Orcish Bowmasters}. In the late game, it either finds the combo piece or provides resilience. Good to recover from discard spells.
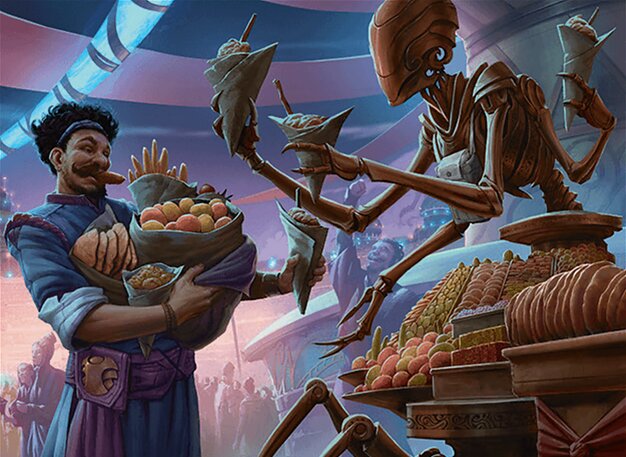
{Stock Up} by Izzy
0/4 {Flow State} — I've noticed several players trying to force this card into the list simply because it's a busted card on paper—some are even arguing it's better than the banned {Expressive Iteration}.
However, like {Expressive Iteration} (which never saw play in this archetype), {Flow State} doesn't fit the Sneak and Show variant well. Just because a card is powerful doesn't mean it belongs in your deck.
Its condition can be hard to meet early, and from turn three onward, we care more about resolving our combo or casting {Stock Up}. That said, it may find a good home in pure Omni-Tell variants, which play a different, slower game plan focused entirely on setting up and sculpting the perfect hand.
Honorable mentions go to {Impulse} and {Intuition} (though they aren't considered cantrips, they can act as if they were). Like {Flow State}, these cards invite careful consideration but ultimately fit better in pure Omni-Tell variants. This is especially true for {Intuition}, which shines in those lists by definitively tutoring for missing combo pieces.

{Intuition} by April Lee
2.1.3 - Counterspells
4 {Force of Will} — This card is set four times. With {Force of Will}, we can protect our combo from opponents' counters, stop faster decks like Oops, All Spells! and the mirror, and prevent lockpieces like {Containment Priest} and {Ensaring Bridge}.
0/2 {Spell Pierce} — This efficient one-mana counterspell answers many of our most problematic matchups, stopping early disruption like {Thoughtseize}, {Chalice of the Void}, and {Trinisphere}. It also outperforms alternatives in the mirror match, providing crucial interaction when efficiency matters most.
0/2 Daze — {Daze} occasionally appears in fast lists as an alternative to {Spell Pierce}, but is generally not played much. There are reasons for this: if you're very fast, you usually don't have an island to bounce.
If you're slower, your opponent can usually pay a mana. Tempting, but usually worse than it looks. If you are in {Daze} and need mana, for example, to set up a {Sneak Attack} + activation, and you have a {Hexing Squelcher} in play, you can play the {Sneak Attack} while holding priority and, in response, play the {Daze}.
Since the {Sneak Attack} cannot be countered, you will have the mana to play on your turn and put a creature into play. Of course, this play doesn't justify using {Daze}, but it's worth keeping in mind. It can also be used to reset the Surveil ability.

{Flusterstorm} by Erica Yang
0/2 {Flusterstorm} — While technically a classic sideboard card, you often see one or two copies of {Flusterstorm} in main decks. It's significantly better than {Spell Pierce} in Counterwar, but it doesn't prevent artifacts, enchantments, or planeswalkers. If you're using {Flusterstorm}, for example, holding {Lotus Petal} to cast on the combo turn helps with Storm.
0/3 {Veil of Summer} — If you are playing the [r][u][g] version of the deck, you may want to consider running {Veil of Summer} as protection. It not only helps in counter wars but also provides a valuable card advantage. In a meta where {Thoughtseize} is one of the most commonly played cards, {Veil of Summer} offers strong defense. It also protects against edict effects, {Brazen Borrower}, and many other [u] and [b] spells.
2.1.4 - Lands & Mana
For most lists, 19~20 lands have proven to be optimal. The decklists in the next section show that almost all rely on the same mana base: three dual lands, three basic lands, eight fetch lands, four {Lotus Petal}s, and five Sol lands.

{Volcanic Island} by Brian Snõddy
2/3 {Volcanic Island} — We're playing a [u][r] deck. This is the [u][r] dual. Any questions? We need reliable access to both colors.
{Volcanic Island} lets us do both {Show and Tell} and {Sneak Attack} if we haven't decided yet. Of course, the land is vulnerable to {Wasteland}. Since we have {Blood Moon} in the sideboard, we won't play more than three copies. Two might be enough, though.
0/1 {Mountain} — Sometimes you see a single {Mountain} in the lists. It can be annoying in the starting hand, but it helps against {Wasteland}. This is especially important for {Sneak Attack}s. If you play a {Mountain}, you should definitely play four {Scalding Tarn}s.
1/2 {Island} — Our {Island}s can be found by all fetch lands in the deck and provide us with safe mana for cantrips like {Brainstorm} and {Ponder}. The number varies between two and three, depending on whether you have {Boseiju, Who Endures} and {Mountain} in your deck.

{Simian Spirit Guide} by Dave DeVries
7/9 Fetchlands ({Scalding Tarn}, {Polluted Delta}, {Flooded Strand}, {Misty Rainforest}) — Fetchlands search for {Volcanic Island}, {Thundering Falls}, {Island}s, or {Mountain}s. They improve cantrips by shuffling.
3-4 {Lotus Petal} — The {Lotus Petal} is a mana accelerator that can advance our combo by one turn. Theoretically, with {Lotus Petal}, we can win on turn one with {Show and Tell} or generate an extra red mana to activate {Sneak Attack}.
This little flower has also cast {Brainstorm}, {Spell Pierce}, and {Pyroblast}. Although it's rarely destroyed, you shouldn't throw it onto the battlefield without careful consideration. Lately, we've seen more lists that play only three instead of the usual four.
0-2 {Simian Spirit Guide} — Monkeys with Weapons! The Spirit Guide is a mana accelerator that occasionally appears in more aggressive lists – sometimes only once, sometimes in the entire playset.
Its advantage over {Lotus Petal} is that it arrives unexpectedly, is uncounterable, and can sometimes block as a creature or even deliver the last two damage (a recurring problem after {Sneak Attack} into {Emrakul, the Aeons Torn}).
Its downside is that you can't use it to cast {Show and Tell} on turn one. Postboard, it enables the dreaded "Monkey Force" when used with {Pyroblast}. Play it as an additional resource to {Lotus Petal}, not a replacement.
{City of Traitors} by Kev Walker
0-1 {Chrome Mox} — {Chrome Mox} can be pitched to both blue and red. The chance of executing a {Show and Tell} on turn one increases significantly when you use Mox or open with {Stock Up}.
However, card disadvantage can really hurt at certain points in the game. The four-{Stock Up} version makes imprinting less painful. That said, this build can be heavily punished if the meta is full of tax effects like {Thalia, Guardian of Thraben}, {Trinisphere}, and {Sphere of Resistance}.
3-4 {Ancient Tomb}s — {Ancient Tomb} is a "Sol land" that [2] provides us with mana. In exchange, we lose 2 life each time, which is negligible early game. This mana [2] helps us cast our key cards quickly.
In the late game, you tap {Ancient Tomb}s as infrequently as possible. Most players run three {Ancient Tomb}s. If you don't have two {City of Traitors}, you can also run four {Ancient Tomb}s.

{Ancient Tomb} by Colin MacNeil
2 {City of Traitors} — The second Sol land. {City of Traitors} also has a drawback: if you play another land, you must sacrifice the City.
Of course, you can tap it for mana beforehand. Besides {Volcanic Island}, the City is the top target for opposing {Wasteland}s, so use it carefully. Most decks run exactly three {Ancient Tomb}s and two {City of Traitors}.
1-2 {Thundering Falls} — Think of this as a budget-friendly {Volcanic Island} that comes with the clear drawback of entering the battlefield tapped.
However, entering tapped is rarely a dealbreaker here, and you can even retrigger its Surveil ability in the late game with {Daze}. Just be careful not to expose yourself to {Wasteland} for a free scry; sometimes it is much safer to forfeit the Surveil value and keep a basic {Island} out of reach.

{Mistrise Village} by Marco Gorlei
1-2 {Mistrise Village} — This nonbasic utility land will often enter the battlefield untapped provided you control a {Mountain} (basic or dual), helping you guarantee that your critical combo pieces resolve.
Forcing through a {Show and Tell} requires five total mana (including this land), while a fully protected {Sneak Attack} loop requires six. It shines against control decks where you have the time to accumulate mana, as well as in the mirror match.
It is equally potent against opposing combo lists, ensuring your own {Force of Will} cannot be countered. Against tempo decks, it pairs beautifully with a green splash for {Carpet of Flowers}. The drawback is that {Wasteland} easily exposes it, and you can't tutor it with Fetch. But if you decide to play it, it probably fits better as a fetch land or even a mana accelerator like Simian.

{Boseiju, Who Endures} by Esuthio
1-2 {Boseiju, Who Endures} — Don't try to jam this card if you aren't actually running a [g] splash—relying on a lone {Lotus Petal} to cast it won't work consistently.
With the [g] mana to back it up, it handles almost every headache in the format. It answers dangerous lands like {Karakas}, {Maze of Ith}, and {Dark Depths}, while cleanly destroying hateful artifacts and enchantments like {Chalice of the Void}, {Ensnaring Bridge}, and {Trinisphere}.
It even shines as a mirror-match answer. To make things even better, its cost drops from [1][g] to [g] if you already have a creature on the board. In the [g] variant, this card helps stabilize the mana base and directly addresses an inherent structural weakness compared to the traditional [u][r] version.
1-2 {Tropical Island} — Mandatory if you're splashing [g]. There's not much else to say.

{Boseiju, Who Shelters All} by Ralph Horsley
1-2 {Boseiju, Who Shelters All} — This card functions similarly to the "Village" land but is slightly worse overall, since you can only spend its mana on instants or sorceries.
Because it doesn't generate [u] mana, it can easily lead to awkward opening hands. On the plus side, it requires less setup investment to work efficiently. Unsurprisingly, it has seen far less competitive play since newer, more versatile options were printed.
2.1.5 - Flex Slots
This archetype has roughly four flex slots. Popular options include {Flusterstorm}, {Spell Pierce}, {Daze}, {Simian Spirit Guide}, a second {Omniscience}, a fourth copy of {Stock Up}, or an {Archon of Cruelty}.
There is no right or wrong answer—tune these slots to fit your playstyle and local meta. A great way to decide on these cards is to look at your sideboard plan and pick maindeck pieces that naturally complement your post-board strategy.
Players often run cards like {Brazen Borrower} or {Prismari Charm} as catch-all maindeck answers to problematic permanents.

{Prismari Charm} by Inkognit
In my personal opinion, however, the more you maximize the deck's proactive redundancy, the higher your chances of success. Instead of diluting your game plan trying to answer every potential threat, lean into your own strategy and focus on speed and consistency.
2.1.6 - Sideboard
For the sideboard section, I won't tell you exactly how many copies of each card to run. Instead, I’ll give you the best options so you can build and plan your 15-card configuration.
When building a sideboard guide for Sneak and Show, our card choices generally fall into three distinct categories:
Combo Protection: Cards designed to push our own game plan through opposing interaction (e.g., additional countermagic).
Anti-Combo Interaction: Disruption to keep us from instantly losing to faster or parallel combo strategies.
Permanent-Based Hate Answers: Tools to remove or play around annoying permanents that lock us out, such as {Containment Priest}, {Disruptor Flute}, and {Ensnaring Bridge}.
{Hexing Squelcher} (Combo Protection) — Alongside {Stock Up}, this card might be the second-best thing to happen to the deck since the {Entomb} ban.

{Hexing Squelcher} by Matt Stewart
This Goblin shields our combo and protects our board against almost any threat. Beyond being an absolute blowout in counterwars, it also serves as a crucial buffer against edict effects. It can also chip in for early combat damage or pivot into a legitimate beatdown plan alongside {Magus of the Moon}.
Its mere presence forces opponents to keep otherwise dead removal spells in their main deck, causing them to mulligan into worse opening hands as they try to answer everything. While I don't generally recommend over-sideboarding, if you notice your opponent keeping a heavy removal package in game two, you can easily punish them by siding the {Hexing Squelcher} out for game three.

{Pyroblast} by Kaja Foglio
{Pyroblast}/{Red Elemental Blast} (Combo Protection) — Being able to counter {Force of Will} or {Force of Negation} for just one mana with zero drawback is already incredible. Add the utility of countering or destroying resolved threats like {Tamiyo, Inquisitive Student}, {Kaito, Bane of Nightmares}, and {Murktide Regent}, and these cards become absolute powerhouses.
There isn't much more to say: if you are splashing [r] in Legacy, these are almost mandatory sideboard inclusions. {Pyroblast} is slightly better because it can be cast without a "valid" blue target (allowing you to target any permanent or spell to build storm for {Flusterstorm}). However, budget-conscious players can run {Red Elemental Blast} instead without any major issues.

{Consign to Memory} by Ben Hill
{Consign to Memory} (Anti-Combo Interaction) — {Consign to Memory} is frequently compared to {Stifle}, and while it cannot counter activated abilities, it completely outperforms {Stifle} when dealing with triggered abilities or colorless spells.
Its strongest selling point is the Replicate mechanic. This allows you to completely play around traditional countermagic by copying the spell on the stack.
It even lets you counter an Eldrazi or a spell like {Ugin, Eye of the Storms} while its "on-cast" trigger is on the stack. Furthermore, because Replicate copies go directly onto the stack rather than being cast, they bypass a {Chalice of the Void} set to one.
{Consign to Memory} can safely shut down a {Thassa’s Oracle} win condition in {Doomsday} or {Oops! All Spells}. It is equally devastating in mirror matches to counter massive triggers from {Atraxa, Grand Unifier} or {Emrakul, the Promised End}.
The card is so versatile it deserves its own Legacy article. Remember, you can use {Consign to Memory} defensively to counter {Sneak Attack}'s delayed triggered ability, so you don't have to sacrifice your creature during the end step.

{Magus of the Moon} by Franz Vohwinkel
{Magus of the Moon} — The only sideboard card that doesn't fit neatly into our three main categories is {Magus of the Moon}.
Magus wears a lot of different hats depending on the matchup:
Combo Protection: It provides proactive protection by completely shutting down annoying utility lands like {Karakas} or {Maze of Ith}.
Alternative Win Condition: It allows you to pivot to a backup beatdown plan. This is incredibly effective against Lands and Eldrazi Post, or even against Dimir ([u][b]) and 4-Color Control strategies.
If you can resolve Magus early—before the opponent can establish a board presence or fetch out basic lands—it can completely lock out an unprepared player and win the game on its own.
Board Swiper (Permanent-Based Hate Answers) — If you are unfamiliar with the term, a board wipe (or sweeper) refers to a card that removes all or most permanents—typically creatures—from the battlefield at once.

{Pyroclasm} by Pat Lewis
For Sneak and Show, the most common options in the current meta are {Pyroclasm}, {Brotherhood's End}, and {Fury}. When selecting a sweeper for this deck, it must be able to kill {Containment Priest}.
The ability to clear multiple cheap threats at once or answer larger, high-toughness creatures is a huge bonus. In general, Sneak and Show match up incredibly well against creature-based strategies.
However, you should never underestimate your opponent's board state. Creatures can quickly impose a lethal clock or sneak onto the battlefield to disrupt our combo before we can cross the finish line.
Artifact Hate (Permanent-Based Hate Answers) — Our artifact interaction is designed specifically to answer disruptive pieces like {Disruptor Flute}, {Pithing Needle}, {Chalice of the Void}, {Trinisphere}, {Ensnaring Bridge}, and {Urza's Saga} tokens.

{Abrade} by Jonas De Ro
The same logic we use for board wipes applies here: while being able to answer multiple artifacts at once is a great bonus, it shouldn't be your primary goal. Your main priority is simply clearing the specific lock piece that is actively stopping you from comboing off.
Also, answers that target multiple artifacts at once usually cost more mana or operate at sorcery speed—both heavy drawbacks for a fast combo deck that prefers instant-speed interaction. As a result, the most common artifact removal spells for Sneak and Show are {Abrade} and {Brotherhood's End}.
Both cards offer incredible flexibility, doubling as creature removal with no real downside. You can mix and match these options based on your personal playstyle and local meta.

{Crash} by Doug Chaffee
{Crash} is also an interesting option, as it allows you to deal with hate pieces and go for the combo in the same turn. The drawback, however, is that it can't deal with creatures.
Additionally, if your list splashes [g], Boseiju, Who Endures} is an excellent, uncounterable utility option to keep in mind.
Hate Grave (Anti-Combo Interaction) — With Dimir (UB) Reanimator and Oops! All Spells currently see less play in the meta, so I wouldn't dedicate too many sideboard slots to these matchups unless they suddenly surge in popularity again.
These are fundamentally bad matchups for us; even if we heavily tune our sideboard against them, we can still lose. My philosophy is to bring a few pieces so we don't completely disrespect the matchup, without sacrificing crucial slots for matchups we actually expect to win.

{Surgical Extraction} by Steven Belledin
If you get paired against one of these decks and lose, don't sweat it—that's just Magic.
If you do want graveyard hate, the most popular choices are:
{Grafdigger's Cage}: Almost an auto-win if it resolves, though it loses much of its effectiveness when you are on the draw.
{Faerie Macabre} / {Surgical Extraction}: Excellent free interaction, but they can be vulnerable to discard spells. On the plus side, they offer minor utility against other strategies where you might need to pinch a key card.
{Leyline of the Void}: Unfairly powerful if it's in your opening hand, but you strictly need to run all four copies to reliably see it.
{Carpet of Flowers} (Combo Protection) — Carpet really shines against blue tempo strategies. It provides an incredible mana engine that helps us easily navigate around soft permission like {Daze} and resource denial from {Wasteland}.
While not strictly mandatory, it's also highly effective against slower blue control decks. You can certainly experiment with it based on whether you are on the play or the draw. The massive mana advantage it generates can occasionally let you bypass your own combo entirely, giving you enough resources to hardcast massive threats like {Atraxa, Grand Unifier} or {Omniscience}.

{Atraxa, Grand Unifier} by Anato Finnstark
3 — Decklists
Recent successful decklists prove there is still plenty of room for innovation, letting you tune the archetype to your preferences. While you will put up solid results by copying any of these established lists verbatim, don't be afraid to tweak a few slots to better respect your local meta.
TheGrimLavamancer — Top 4 Legacy Showcase
TheGrimLavamancer — Top 4 Legacy Showcase
TheGrimLavamancer — Legacy Challenge Top 4 w/[g] Splash
Snoopy — Legacy Challenge Finals
Mizu — Legacy League 5-0, Tournament of the Gods Champion
winszerofnc — Legacy League 5-0
4 – How to Play
"It's easy, right? {Show and Tell}, Emrakul, done!" Not so fast. While this is one of the simpler decks in Legacy, you still need to master a few things. Here are some basic principles and simple tricks every player should know.
What hands do I keep?
Magic players criminally neglect mulligans. With the right or wrong decisions, we can lose before the first land is even played.
Sure, there are snap keeps like {Show and Tell}, {Emrakul, the Aeons Torn}, {Ancient Tomb}, {Lotus Petal}, {Omniscience}, {Ponder}, and {Force of Will}. Hands like these win 99% of all games, but anyone can hold and play them. With all other hands, the more important question is: what do we want to achieve?
Offensive hands should give us a plan to take action on turn two or three. We don't necessarily need all the combo pieces in our starting hand if we can use cantrips to search for missing cards. In this case, the first mulligan is usually relatively painless.

{Archon of Cruelty} by Andrew Mar
Defensive hands, for example against Reanimator or Storm, should give us enough to reach turn three. Redundancy, especially with counterspells, is good. {Brainstorm} is excellent. At the same time, we should have at least two lands.
In control matchups and the mirror game, the focus is on reliably playing lands and preventing key plays, so combo pieces in the starting hand matter less. Two cantrips, three lands, and a {Spell Pierce} can be an excellent hand.
In other words, the criteria for keeping a spot are simple: win (have the combo pieces), find a way to win (cantrips), or at the very least, don't lose (counters).
On the Play, Unknown Opponent
Always fetch up a basic {Island} if you want to go for turn one {Ponder}.
If you {Ponder} and don't shuffle, try to play around discard by leaving your business / important spells on top instead of drawing them.
If you have the choice between turn one {Ponder} and keeping up {Spell Pierce} without a {Force of Will} in hand, always keep up {Spell Pierce} against discard and fast combo decks.
If you have a {Spell Pierce} and a {Brainstorm} with a land and a {Lotus Petal}, it can be okay to give away information by playing {Lotus Petal}, since it lets you cast both {Spell Pierce} and {Brainstorm} if you are forced to.
How do I play my cantrips correctly?
As mentioned above, a lot of insightful writing already exists on "{Brainstorm}ing correctly." So this section focuses on when to play which cantrip. Of course, there are countless exceptions, and as always, personal experience is the best teacher. But here are some general guidelines:
With so much discard in the current meta, a blind turn one {Ponder} is usually not optimal if I also have {Brainstorm} or {Spell Pierce} in hand.

{Thoughtseize} by DiTerlizzi
Use {Brainstorm} before {Ponder}/{Preordain} if we need high-quality cards and can't shuffle in between. Use {Ponder}/{Preordain} before {Brainstorm} if we want to see as many cards as possible.
{Brainstorm}ing without shuffling afterward? We can certainly accept that sometimes. For example, if we only need one more card at the end of turn one to go wild on turn two. The {Brainstorm} Lock is a calculated risk.
Which should you play first: {Show and Tell} or {Stock Up}? It depends on the rest of your hand, but generally, if you lack protection, lead with {Stock Up}. If your opponent counters, they must 2-for-1 to stop a setup spell. If it resolves, you can sculpt your hand much more effectively by finding protection or setting up a backup combo piece.
Bluffing with {Show and Tell}: If you are certain your opponent is holding a {Force of Will} or {Force of Negation}, and you lack the counter magic to win a counter war, you can cast {Show and Tell} as a pure bluff. The goal here is to force a 2-for-1 from their hand, even if you don't actually have a creature or payoff to put into play.

{Blufferfish} by Christopher Burdett
How do {Sneak Attack} and {Through the Breach} work in the End Step?
You can use both {Sneak Attack} and {Through the Breach} in the opponent's End Step. In this case, the creature must be sacrificed at the beginning of the next End Step. Here is the corresponding rule:
Comprehensive Rules (Ravnica Allegiance (January 25, 2019)
513.2. If a permanent with an ability that triggers "at the beginning of the end step" enters the battlefield during this step, that ability won't trigger until the next turn's end step. Likewise, if a delayed triggered ability that triggers "at the beginning of the next end step" is created during this step, that ability won't trigger until the next turn's end step. In other words, the step doesn't "back up" so those abilities can go on the stack.
For example, we can activate {Through the Breach} at the end of the opponent's turn to bring in {Griselbrand}. On our turn, we untap and can play cards drawn with {Griselbrand}.

{Blood Moon} by Tom Wänerstrand
How do I bypass Karakas?
{Karakas} with {Pithing Needle} or {Blood Moon}/{Magus of the Moon}? If we have {Sneak Attack} in play and access to it [r][r], we can easily bypass {Karakas}:
Activate {Sneak Attack} in our main phase and pur Emrakul into play.
We pass priority to move to the "Declare Attackers" step.
If the opponent doesn't activate {Karakas}, we're in the "Declare Attackers" step and Emrakul attacks. The Annihilator trigger goes on the stack, which often destroys {Karakas}.
If the opponent activates {Karakas}, we let the ability resolve. Reactivate {Sneak Attack} and then go to the "Declare Attackers" step.
Playing a {Griselbrand}/Atraxa to draw seven/10 cards can be perfectly fine against {Karakas}.
How do I deal with {Containment Priest}?
{Containment Priest} must be in play for the creature to enter the battlefield. Therefore, we have several ways to deal with the Priestess:
We bring {Containment Priest} into play and remove him from the field again before {Show and Tell}, or similar moves resolve. {Abrade} or {Brotherhood’s End} are ideal for this.

{Containment Priest} by John Stanko
We activate {Sneak Attack}, the opponent plays {Containment Priest}, and we respond by activating {Sneak Attack} again. This way, the Beast takes precedence over the Priestess.
If we can't prevent {Containment Priest} from entering the game, we can use {Show and Tell} to bring in something else, ideally {Omniscience}. This lets us cast the animals for free, something {Containment Priest} doesn't prevent.
5. Sideboard Tips
Finally, here are a few quick sideboard tips. Rather than just giving you a rigid "in and out" list, these tips are meant to guide your overall strategy for each matchup.
Use them alongside your specific decklist to make the final cuts and additions. For detailed, matchup-by-matchup guides, check out the premium version.
Blue Fair Decks: Bring in removal, additional countermagic, and your specific hate pieces. {Omniscience} is often “win more” and can be shaved (except against {Containment Priest}), alongside {Force of Will} and a copy of {Sneak Attack} (especially against {Daze} tempo builds).
Non-Blue Aggro & Prison: Bring in your spot/mass removal and board control. Cut conditional counterspells like {Flusterstorm} and Spell Pierce (though {Spell Pierce} should be kept against {Chalice of the Void} / Prison decks).
Combo Decks: Since this deck is usually slightly slower than pure fast-combo, bring in your core countermagic suite and targeted graveyard hate (against Reanimator, Dredge, or Oops, All Spells). Trim redundant combo pieces, extra mana acceleration, or basic lands like {Mountain} that aren't needed in fast matchups.
"Trimming" means sideboarding cards and keeping only one copy. Since our deck runs cantrips, you can try to carve it out if you still need the card. It's quite common to "trim" in Ponder.
6. Budget Options
People often ask me how to build a budget version of this deck. Unfortunately, unless your local Legacy scene allows proxies, I don't think a budget build is really viable.
If you don't have any {Volcanic Island}s or {City of Traitors} yet, I recommend starting with OmniTell. It's still a strong deck, and you'll learn a ton about the playstyle.
If you do own a few Reserved List cards, here's what I personally tested before getting my third {Volcanic} and second City: run four {Ancient Tomb}s and one {City of Traitors{. In fact, the four {Ancient Tomb}s felt even better at times than the standard 3/2 split.
You'll still need two {Volcanic Island}s, but you can replace the third with a {Steam Vents}, a Surveil land, or another basic. Just keep deck synergy in mind—if you decide to run a shock land with four Tombs, skip {Daze}.
Useful Links
Fishing Lessons – Pondering Brainstorm https://articles.starcitygames.com/articles/fishing-lessons-pondering-brainstorm/
Building a Better Player https://articles.starcitygames.com/articles/constructed-criticism-building-a-better-player/
Primer MTG The Source https://www.mtgthesource.com/forums/showthread.php?27217-Deck-Sneak-and-Show
MtG Forum - https://www.mtg-forum.de/topic/145473-show-and-tell/#anker_6
Primer MtG Salvation https://www.mtgsalvation.com/forums/the-game/legacy-type-1-5/established-legacy/combo/179810-deck-sneak-show
Show and Tell Discord - https://discord.gg/ydGN6WRp
Join Our Patreon Subscribe to Our Newsletter Submit Your Article To Eternal Durdles
Subscribe to Eternal Durdles on YouTube! Subscribe to (R)Eternal Durdles on YouTube!
Featured image: {Show and Tell} by Jeff Laubenstein